29 September 2010

Surly one-speed off-road drivetrain spew

Despite the thorough instructions that are shipped with every Singleator(TM), it has been called to our attention that not everyone understands exactly how to install one or what to do in the few instances that installation becomes difficult. What's more is that a lot of you are new to the sport and haven't identified the idiosyncrasies of the one-speed drivetrain in general and how to build and maintain a good one. No worries, we love you, but just because one-speeds are simple and pure and beautiful and wonderful and all that doesn't mean you get to slap one together, neglect it and expect everything to work correctly. In the interest of furthering public knowledge and reducing the number of confused-customer-calls we receive, here's some general information about one-speed drivetrains, how to set one up, and what to do if you've bought one of our godforsaken Singleators(TM) and can't make it work.

1. Micro-drive vs. Macro-drive. The "Micro-drive" concept is bullsh*t on a single-speed. "Micro-drive", a term originally coined and trademarked by the dear departed Maeda Corporation (Suntour), refers to using a system of relatively smaller chainrings and cogs to achieve a similar gear ratio and range as could be achieved previously only with larger chainrings and cogs. "Micro-drive" was made possible at the time by the folks at Suntour by pushing the limits of cog size and making their cassettes with an 11t first position cog. While not a new idea, high-quality heat-treated steels allowed this design to be realized with some degree of success. Matching, lighter, smaller cogs and chainrings and shorter derailleur cages and chains gave the weight freaks something to jump up and down about, and the system actually sorta worked for the rest of us. Shimano copied and the rest is history - say hello to modern multi-speed MTB transmissions.
The reason why it worked and still does is because you could get away with the smaller cogs for higher gears. Let's face it, most of us never spent (or spend) much time in the 11 and 12-tooth cogs so they don't wear all that fast. Furthermore, the time spent in these cogs wasn't ever under full-bore high-throttle. If it ever got so hard to pedal that you needed to stand up, you simply shifted to an easier gear. Had you rode around off-road in a 22x11 cross-gear, without a whole lot of effort you could blow the chain right over the top of those teeth regardless of how new or old your components were. If you didn't realize it, there's only roughly half of the amount of teeth on your cog engaging the chain at any given time. In the case of an 11 tooth cog, that's only 5 or 6 teeth at any given time! Unless your thighs are as big around as a Surly(TM) carpenter pencil, you will be able to make any low-gear transmission required for general one-speed off-road riding skip AT WILL, using an 11 tooth cog...
... and its not so different for a 16 tooth cog, probably the smallest rear cog you might have on your one-speed ride. Considering that you don't shift, you'll be giving EIGHT teeth the full wrath of your wide load up the harshest vertical climbs you choose to attack. What my long-winded explanation is getting at is that more teeth are better when it comes to an off-road one-speed drivetrain. One tooth makes a huge difference out back with regards to preventing skippage. Wear life, too, is improved with more teeth. Since you never leave that gear, every mile you spin is on the same few teeth. Your drivetrain will last longer and will skip less and will launch the chain fewer times if you use larger cogs and chainrings.
I recommend that you pick a big cog out back (18 teeth or larger) and experiment to find a gear ratio you like by varying your chainring sizes up front. The weight penalty here is practically non-existent; there is no benefit whatsoever to using a "Micro-drive" drivetrain on your one-speed off-road bike. Don't do it! It's dumb and you're gonna hurt yourself on a steep climb.
If you have a Singleator(TM): Keeping in mind everything written above, don't you think it's better to run your Singleator(TM) in the �pushing-up� position as opposed to the 'pulling down' position? After all, by pushing the chain up, towards the freewheel, you increase the number of teeth engaging the freewheel for that given gear ratio. Unfortunately, this isn't always possible due to interference with the chainstays, but it is ideal. By the same token, it should now be obvious that since the Singleator(TM) does actually pull the chain away from the freewheel in the 'pulling down' position that you want to minimize this as much as possible. Follow the instructions! Take out as many links as possible! Unlike a derailleur, the Singleator(TM) only has one pulley and wasn't designed to take up any more chain slack than absolutely necessary. And, in situations where you've "Micro-driven" your drivetrain, the 'pull-down' position may never allow you have a sufficient number of teeth engaging the chain for your particular application, weight, or riding style. If you encounter a situation where you've taken out as many links as possible yet the Singleator(TM) still pulls the chain away from the freewheel far enough to cause skippage ("worst case scenario"), change your gear! Get a bigger cog! Get a bigger chainring! Try one tooth smaller on the chainring and take out another link! Re-arrange it, brahh!! You can do it! This worst-case scenario happens very rarely, but enough times to write this, so I hope I'm helping someone. Finish this article before you scramble for the chain-breaker, though...
2. Chainline. Chainline refers to the alignment of the front chainring and the rear cog. Chainline is important on all bicycle drivetrains but especially so on a one-speed. A perfect chainline is one in which the chainring and rear cog are in perfect alignment with each other and the chain takes a perfectly straight path from the chainring to the cog. Anything less than damn close on a one-speed will result in premature drivetrain wear and frequent chain launching. Chain line can be fine-tuned by re-spacing your hub, adding or deleting freewheel spacers or cassette spacers, changing cranks, changing b.b. spindle lengths or shimming bottom brackets, using spacers between the crank spider and chainrings, and whatever else you can think of to get your ring and cog to line up nicely. Your drivetrain will be quieter, too.
If you have a Singleator(TM): Make sure the adjustable pulley is aligned perfectly in your chain line. If it is slightly off it will make noise and wear out the pulley quickly. If it is way off, you can and will tear the Singleator(TM) and/or derailleur hanger off the bike. Do it right and enjoy.
3. Chain tension - how to do it right. If your chain is too tight, it will wear too quickly, it will side-load your freewheel or cassette body causing the pawls inside to skip, and it will require more energy to pedal. If your chain is too loose, it will throw itself off on the downhills and skip over the top of the cog and/or chainring on the steep uphills. You may have noticed when trying to get your chain tension dialed in correctly that the chain is tight in some spots and loose in others. This is normal(sic). Chainrings, freewheels, cassette bodies and crankarms bend, warp and deform to a certain degree with use, and generally aren't perfectly round to begin with. I like to adjust my chain so that is tight enough so that it almost wants to stop the cranks from freewheeling backwards when it is at its tightest spot. That's kind of hard to explain clearly but suffice to say you won't have any catastrophic problems related to chain tension if you can keep the tension somewhere between 'so loose the chain is flopping around on the downhills' and 'so tight you can feel resistance when you pedal backwards.' For those of you with bolt-on hubs, greasing the axle nuts or bolts will help keep unwanted wheel movement to a minimum while you're trying to get your tension set just right. Tightening left and right bolts a little at a time helps, too. Good luck.
If you have a Singleator(TM): If you're running a Singleator(TM) on a bike with vertical dropouts, its sole purpose is to provide adequate chain tension and keep it on the cogs where its supposed to be. Whether you have selected the 'pushing up' position or the 'pulling down' position, read and re-read the instructions to determine you have the correct spring installed, then CRANK IT UP! Don't be shy! If you crank it the wrong way with the wrong spring installed you will ruin your Singleator(TM), though, so be careful. Certainly our spring has its limits, and you almost certainly won't ever be able to get the same amount of chain tension with a Singleator(TM) as you will with a dedicated, horizontal-dropped single-speed, but you can definitely get the chain really nice and safely tight with a Singleator(TM).
4. 1/2x1/8" chains vs. 1/2x3/32" chains. 1/2x1/8" chains suck. Run whatever you want, but bigger isn't better here. Yeah, they're wider, but according to manufacturer-supplied data, they're not stronger and they are definitely not of better quality. Multi-speed drivetrains is where the bucks are at, and chains that work on such drivetrains are where the manufacturers of chains showcase their innovations and developments in quality. The rollers are better, the plates are better, the pins are stronger, and the construction method (riveting procedure) is better on all multi-speed 3/32" chains. I guess if you grind your chainring and chain down the handrail every night at the local pub, a bigger 1/2x1/8 " chain will last longer, but most of us don't and it won't.
If you have a Singleator(TM): Dammit, don't use a 1/2x1/8" chain!!! Otherwise, you'll tear the Singleator(TM) off the bike, among other things, guaranteed. Such gross failure to follow instructions and subsequent damage is not covered under our "we love almost everybody" warranty policy.
5. Shifting-enhanced cogs vs. Normal cogs. Shifting-enhanced cogs, typically Shimano Hyperglide(TM) or Interglide(TM) cogs, refer to rear cogs that have been machined, stamped, pressed or otherwise manipulated to allow a chain to enter and exit easily for clean, smooth shifts on a 5- through 9-speed cluster of cogs. They work pretty good on multi-speed bikes and equally as well on one-speed bikes. Avoid using them on your single! When you put the power down, they'll shift all right-- and you'll be visiting the dentist. Get a dedicated one-speed hub and use a threaded BMX freewheel or use a Shimano DX(TM) BMX cog on your multi-speed cassette hub – they're thick, flex-free and don't have nice exit ramps stamped in 'em. Trust me on this one!!!
6. Hey, REPLACE YOUR PARTS OFTEN! You will have to. Let's say the average dude spends most of their time in 5 or 6 different gears (out of 27, sheesh!) on any given multi-speed bike ride. You spend all your time in one gear. And you're wrenching the snot out of those drivetrain parts in a way they weren't designed for. Your parts will last 1/5 or 1/6th as long as the average dudes'. Ever wonder why you can't get more than 3 months out of a freewheel before its starts skipping on you? First off, they aren't sealed properly, contaminants get into the pawls and impede the motion necessary to engage the teeth. Furthermore, the freewheel gets twisted and warped under all of your torque, making it more difficult for the pawls inside the freewheel to find their teeth on a regular, reliable basis. Pick up a beat, old freewheel, hold the center and spin the outside - you will see what I mean. BMX freewheels and even mountain-bike cassette bodies were never designed for the sort of repetitive, high-torque abuse that one-speeding wreaks on drivetrain parts. Until someone makes a bomb-proof freewheel or cassette hub (King? $$$), get used to replacing these parts often!
7. Hey, USE NEW PARTS TOGETHER!!! Just like on multi-speed drivetrains, used cogs and rings don't like new chains and vice-versa. If you mix 'n match new and old drivetrain parts, particularly cogs and chains, I hope its on your urban luxo-cruiser. Otherwise, always replace cog, chain, and freewheel together for best results. If you replace your chains a lot you can get a lot more life out of your cog and ring, but especially on a single, if you ride technical stuff and up big, steep hills that almost stop you in your tracks, you're pushing your equipment to the absolute limit. Don't believe me? Ask a friend of similar weight and strength to you to ride their multi-speed 25 times hard with a new chain and measure the amount of stretch from the center of one pin to the center of another pin 15-or-so links away. Every link is supposed to be exactly 1" long from pin center-to-pin center. It stretches a lot. And fast. Do the same thing with your single-speed -- new chain, 25 hard offroad rides. You won't believe how much more the chain stretches! By replacing cog, chain and ring together, you ensure that the teeth and chain wear together to ensure a good, strong mesh that won't skip under load. By mixing new and old, you won't get the symbiotic (ulp?!) wear patterns that allow tooth and chain to mesh together properly. You will get funky 'ticks' and 'pops' and skipping under load. This is age-old wisdom here.
8. Frame flex. Your one-speed mountain bike or cross bike has probably been designed to be at least reasonably light; even Surly folk don't enjoy riding 30 lb. bikes up hills. That means you have a light frame that has thin, light chain and seat stays that are anywhere from 16-20" long. Every time you push 'n pull on the pedals, the bottom bracket swings back and forth and the long and skinny stays get pulled toward the drive side of the bike. The whole machine is gettin' twisted by your upper and lower body, especially so on the tough climbs. To a certain degree this flex is desirable and produces a comfortable ride, but any flex at all in a drivetrain system creates deviations that cause skippage, premature wear and, depending on your girth, chain launching. This is not a factor to be ignored! The best way to deal with drivetrain deviations from flex is to make sure all other factors are in order. Certainly a 3.5 lb. cro-moly frame is not the best choice for a one-speed, and if you're in this boat, I hope you weigh under 150lbs. Otherwise, by making sure your chainline is perfect, your rear cog is big, you're geared low enough, your drivetrain is in good shape and all components are wearing together, and your chain is tensioned and lubed properly, you can minimize any potential problems frame flexing will have on drivetrain skipping, chain launching and premature wear.
9. Gear lower. I know all you guys and gals out there are gorillas and want desperately to outdo you pals mentally, socially, physically, etc. on rides, but from a functional standpoint lower gears are better on a one-speed off-road drivetrain. I suppose if you're a member of the go-fast club you have to run a big gear, so you HRM-types can skip this part. But if you're more concerned with your ability to ride and clean the tight stuff, you'll be doing your style a favor and you'll be sparing your drivetrain a small measure of unnecessary abuse by sticking with low(er) gears. Yes, you do have to "spin" more on the flats, subjecting drivetrain parts to more cycles and more wear, but by not having to herniate yourself up the climbs you will be reducing the amount of shock, distortion and potential for catastrophic skippage or breakage of your drivetrain components. Not to mention your unmentionables.
10. Lube your chain. C'mon.
11. Lube your freewheel. There's bearings and moving parts inside. Use oil, not grease. C'mon.
12. Other problems, er, human error. Before you curse your one-speed or the Singleator(TM) and the folks who made it, read and absorb the guidelines above. While any competent, professional mechanic should be able to diagnose any specific problem you are having with your drivetrain, if you're going solo, it might be tough for you to pick out which exactly of the above is giving you fits. If you have indeed digested and tried all of the above but still can't get your sh*t together, drink a few beers then read it again. Or drop your ride off at a good local shop and pay a little. Or give us a call – we'll give you a little hell, but we like to help, otherwise we wouldn't have written this. Or give up and ride a geared bike -- after all, "there's nothing wrong with that"...
Love, Wakie
The 1x1(TM) gear chart

1x1242628293031323436
161.501.631.751.811.881.942.002.132.25
171.411.531.651.711.761.821.882.002.12
181.341.451.561.611.661.721.781.892.00
201.201.301.401.451.501.551.601.701.80
221.091.181.271.321.361.411.451.551.64

[This was lifted from the Surly web site by me. Because it was so darn good. Gotta give credit where it's due.]

cyclist's pre-nuptial agreement

A Pre-Nuptial Agreement for the Bicycle Rider

by Anonymous

This agreement acknowledges that the forthcoming marriage is a legal arrangement that accepts the perpetual continuity of a pre-existing relationship between two parties and that a three-way coexistence shall be created consisting of the following participating parties: Spouse A (the loving, non-bicycle rider), hereafter referred to as SA; Spouse B (the loving, bicycle rider), hereafter referred to as SB; and The Bike (the all-beautiful, glorious one), hereafter referred to as TB.

ring


Condition I
Acknowledgment: SA shall henceforth recognize that SB and TB have forged a long-standing relationship and unbreakable bond. Efforts or attempts to alienate, separate, or to divide permanently or temporarily, regardless of circumstances, shall never occur.

Condition II
Cohabitation: SA and SB shall agree upon comfortable and equal living quarters for TB, its related service equipment and riding gear. TB shall only be exposed to the elements of Nature during outdoor rides. All other times, TB shall have access to warm, dry, low traffic living space with complete protection from any and all physical harm. If at any time there is a conflict with SA, SB, furniture or other objects, TB shall have absolute precedence of its desired stationary location. In the event SA is absent overnight or longer, TB shall be permitted bedroom space (if not already arranged).

Condition III
Exclusivity and Infidelity: At no time shall TB be ridden by anyone other than the parties of this agreement, without the sole permission of SB. SA must request permission from SB to ride or attempt physical contact with TB and shall only do so in the presence of SB.

Condition IV
Equal time: SA shall be guaranteed equal, quality time with SB, equivalent to time spent with TB unless it conflicts with TB; in which case TB has absolute preference. Evening hours of darkness, rain or any weather conditions which may be considered undesirable by non-bikers, does not offer SA preferential status if SA and TB view these moments to train for these possible weather conditions. Maintenance-service time shall be as determined by SB and shall not be interfered with by SA or others, without approval of SB. In the event of an emergency (i.e., SA needs assistance; child sets hair on fire, etc.) SB shall complete any or all TB related activities as soon as possible and, then and only then shall SB be expected to address said emergency. In the event of distress, a visit by In-laws, need of stress relief or other moments of depression, SB shall be permitted as much time with TB (or TB related activities), magazines, books, events, etc. as necessary for SB to return his/her emotional status to an uplifting and happy mode.

Condition V
Parties SA and SB shall agree that SB will be permitted and encouraged to purchase any and all TB related equipment at any and all times, whether the aforementioned be repairs, replacements, upgrades or just cosmetic. Any replacement parts shall be considered cherished spares and provided adequate, preferential storage space equivalent to conditions set to TB; preferably under the bed, favorite closet or placed on the coffee table for a conversation item. Coffee table books, such as but not limited to, the biographies of Greg LeMond, Eddy Merckx, Fausto Coppi, or any history of the Tour de France, shall retain prominent placement on said table; free from possible damage related to the displayed replacement part.

Newly installed items on TB shall immediately require TB to be prominently placed on display as the focal point of the household (i.e., in front of the television). Newly purchased items, which have not been installed, shall be openly displayed as a centerpiece, to be seen and envied by all visitors. Said item shall be allowed to be placed under SB's pillow during the sleeping hours unless it is potentially harmful to said item.

This provision shall be enforced until the installation is complete. Mental, physical or marital interventions shall not be exercised to install the item until SB is ready to perform this action. Only SB shall be the deciding party in this determination and there shall be no compromise.

Condition VI
Finances: All household finances shall be considered separate from TB finances. If Conflicts should arise, TB gets preference.

Condition VII
Disposition: In the event SA has a compatible bicycle, SB can offer spare parts to be temporarily installed for use by SA, until such time when SB requires their use on TB. Advance notice of this return is not required. All equipment of and for the use of TB by SB shall remain the sole property of SB come Hell or high water and shall not be relinquished under any circumstances, Courts of Law, moments of contesting spousal madness and death of SB. In the event of the death of SB, SA will be obligated to complete the upgrades (expressed, implied or dreamed of) and bury the bicycle with the departed. Should SB have previously requested a separate grave for TB, SB and TB will be buried side-by-side in separate caskets, in a common, doublewide grave. A common headstone shall be placed centrally at the head of the grave and the complete identification of TB's frame, components, wheels and tires shall be engraved on the head stone. Tires shall be inflated to full-recommended psi ratings prior to placing in the casket. In the event of the later death of SA, burial of SA shall be adjacent to SB, not TB.

Condition VIII
Protected Communications: All TB related communications intended for SB, be they voice (telephone messages, visitors, etc.); print (mail-order catalogues, product mailings, etc.) or electronic (email, voice-mail, buddies calling to ride, etc.), shall be promptly expedited to SB. Furthermore, no censorship of said communications shall ever occur and SA agrees to refrain from making disparaging comments about the content of these communications and/or their source(s). Improper language (i.e., cursing) is prohibited in the household and outdoors in the presence of TB; this is especially important if the curse words are of Italian origin. Italian is never to be spoken unless the speaker is fluent; however if the components are Shimano, then English is the preferred language of communication and Italian is forbidden to be spoken.

Extended Conditions: TB shall never be subjected to be the focus or object of a disagreement, or be introduced as part of said disagreement. Conversations relating to TB shall always be of praise and admiration; visitors, including in-laws, who are not in agreement with this condition, are banished from the household of SB, TB and SA forever until they come to their senses.

All of the above conditions, in whole or part, are forever to be considered iron clad, irrevocable and nonnegotiable.

Signed
Party SA_____________________________
Party SB_____________________________
Date:________/_________/_________

Redline Conquest Pro


Frame Redline Conquest Pro – Aluminum
Size 60 cm
Fork Redline – Aluminum
Components
  • Avid mechanical disc brakes (essential for wet weather riding)
  • 180 mm Suntour XC Pro cranks
  • Phil Wood BB
  • cobbled together Shimano drivetrain
Gears 36/50
12-27
Wheels
Weight 25 lb.
Notes

This is my rain bike.

Also known as the 'winter' bike or the 'dedicated fender' bike or the 'randonneuring' bike. Sometimes I feel like I spend more time on this than my nice road bike... probably true as we have our share of damp weather in Seattle.

Up until December 2010 my rain bike was an old Bianchi Volpe but it died a quiet death.

Technorati Tags: ,,

28 September 2010

Fixed Gear – Training

OK, you've built your fixed gear bicycle or you're considering building it and you want to know what it's possibly good for. Fair enough, here are some benefits:

  • RESTING - On a fixed gear, you'll get less of it. Since you can't coast, each ride will seem like it's about 30-40 percent longer than it really is. If nothing else, this is testimony to how much we all coast during a regular bike ride. This is also cool because the longest fixed gear ride you will ever have to do is about 40 miles.
  • TECHNIQUE - Hopefully, riding a fixed gear will improve your pedal stroke. It is of course possible to ride a fixed gear bike for months and not improve at all but you'd really have to work at it (not improving that is) or just never ever go down a hill. And that would be a shame. The idea here is to get better as time goes by. To try and 'flow' while on the bike, to move one foot out of the way of the other, to become more relaxed in the saddle, to loosen your grip on the bars and to feel more at home while you ride. Don't fight it, change is usually good.
  • STRENGTH - It will improve. Think about it, you will never be able to shift down for a hill. This may sound intimidating at first but it's actually very liberating once you try it. Removing the stress of thinking about what gear to shift into when a hill approaches is HUGE. You now only have two choices, sit down or stand up. Whew, what a relief... Seriously, too many people run for the granny gear when they start every little incline. A fixed gear will require you to push harder on your pedals thus making you stronger. And like Martha says, "It's a good thing."
  • SPEED - Yeah baby, leg speed WILL increase. Once again, you can't coast. This will make you see descending your favorite hill in a whole new light. In fact, riding a fixed gear bike has been known to make people that used to abhor climbing into hill fanatics. Increased leg speed has SO many benefits. It allows you to spin along at higher cadences on climbs saving your strength for when the hammer really gets dropped, it allows you to close those gaps in a fast-moving paceline much more quickly, it gives you a better jump in a sprint and it means you will last that much longer on those killer descents before you actually spin out and have to coast. Heck, you might even be able to drop your friends the next time you return from climbing a mountain pass!
  • SKILLS - You'll get some. You won't be able to coast to get a drink, to look behind you, to take off clothing, etc. Hey, is there a theme here...? You guessed it, YOU CAN'T COAST.
  • PACE - It will become more consistent. There is nothing like riding a fixed gear in a pack of geared bikes to make you realize how damn jerky everyone else is in terms of maintaining the same pace. You can't coast so you are always applying either forward or backward pressure on the pedals. This is an enormous aid towards being really smooth. Your paceline buddies will love you all the more. And isn't love what it's all about? I'm getting verklempt, discuss amongst yourselves...
Right, but what about the drawbacks? Well sure, there are some, like:
  • Your geared bike may actually seem like a huge burden to ride. Who can keep track of what gear they are in all the time anyway... And there's so much stuff to maintain and clean and lubricate and replace, what a HASSLE!
  • Unless you have a DAMN nice geared bike, it may actually be heavier than your fixed gear. Seriously, think of all the crap you removed from the frame to create your fixed gear. Practically the whole drivetrain! That's not insignificant when climbing believe-you-me.
  • You may end up like me, spending the whole fall and winter calling friends up on the phone asking them to go for fixed gear rides and having no luck... Oops, did I sound bitter? My apologies. Then again, perhaps this web page will help change that.
  • You'll start to collect lots of links from esoteric web sites that promote single speed bikes and fixed gears. You'll get all cocky and 'indie' and try to out-geek other cycling friends with talk of gear inches, killer descents and how long you lasted before you had to grab your brakes. Oh well, once a nerd always a nerd I suppose. Riding a fixed gear won't change that.
Riding a fixed gear is just coming full-circle. Most of us started out on a fixed gear tricycle and this is just another attempt to return to that state of innocence.

Technorati Tags: ,

Fixed Gear - Equipment

Here is what you will need to build your own fixed gear bicycle:
  • A frame with horizontal dropouts.
  • A rear wheel with a threaded hub.
  • A single speed cog.
The rest is quite simple. Here's how to do it:
  • Remove the shift levers, derailleurs and associated cables & housing.
  • Remove the freewheel from the rear wheel.
  • Install the track cog on the rear wheel.
  • To size the chain, clamp the rear wheel all the way toward the front of the dropouts.
  • Size the chain so that it's as short as possible and can still wrap both chainring and cog without binding.
  • Slide the rear wheel back in the dropouts until the chain is the correct tension, clamp it and you're done.
  • Don't forget to check your chain-line. From the back of the bike, sight along the chain and make sure it is fairly straight. If it's not, move the chainring to the inner/outer position on the crank or stick a spacer behind your cog or re-space and re-dish your rear wheel. If your chain-line is really bad, the chain will fly off when you push hard and you will fall down and go boom. Ouch...
Here is a bicycle info and maintenance article that I found on the Surly web site (which I have freely plagiarized here) that is really quite useful. It explains a lot about single speed drivetrains and contains some very important cautions/considerations that the single speed novice might not be aware of.

ASIDE - What is the correct chain tension? The chain should be snug without binding at any point during the pedal rotation. Clamp the wheel in place and pedal the bike while running your fingers along the chain. You will feel the chain get tight, then loose, then tight and then loose again. That's because of things like the threads on the hub not being perfectly centered, etc. With a derailleur, this doesn't matter because the cage takes up the slack in the chain. With a fixed gear it's crucial to get it right. If the chain is too loose, it may fly off while you bounce around on a bumpy road or while spinning at really high cadences. If it's too tight, it will bind with each pedal stroke and slow you down. If you have to, err on the side of having it too loose. If it flies off, it's not the end of the world. You can just stop, put it back on and continue your ride.

If you want to get fancy, here are some more things you can do to make your fixed gear bicycle uber cool:
  • Remove the outer chainring. This will require that you get some 'single' chainring bolts (which are just shorter than 'double' bolts).
  • Since your chain line is probably not perfect, it really is nice to re-space the rear hub in order to line up the cog with the chainring and then re-dish the rear wheel. Go on, it's not that hard or expensive, and it will give you a stronger rear wheel and a drivetrain that will last to boot.
  • Gee, did I say 'things'...? Well that's it. There isn't anything else to do. That's the beauty of a fixed gear, it's so damn simple!
  • Since this bike will get used (by most of us) primarily in the winter, I might suggest getting some fenders as well. Shoot, the bike is so light already, fenders will hardly get noticed.
NOTE - Want to convert your existing geared bike to a single speed and not a fixed gear? Try this converter from Nashbar.com.

FAQ

BRAKES
Q: Martin, I've seen movies of NY messengers where they don't have any brakes on their fixed gear bicycles, can I take those off too...?

A: NO! Leave both of your brakes on and make sure they are well adjusted. A fixed gear bike is not always like a true track bike in that there is usually not a reverse-thread lockring holding your rear cog onto the hub. In the event you have a real panic stop, it's entirely possible that your cog will spin right off your wheel and without brakes, you'd be helpless. Plus, unless you have mastered the skid technique of scrubbing off speed you will need brakes.

MORE ABOUT BRAKES
Q: But Martin, I've seen messengers in Seattle ride around with only the front brake, surely that must be OK...?

A: NO! See above tip. If you ever have to do a panic stop with only your front brake and don't have mad skillz, you're guaranteed to endo or push out your front wheel as it looses traction. Think of all the embarrassment you will save yourself by just keeping that second brake ON YOUR BIKE.

Q: Won't all the messengers think I'm a dork for using brakes?

A: Maybe.

Technorati Tags: ,

Fixed Gear - Gearing

First, let's talk 'Gear Inches'.

'Gear Inches' is the equivalent diameter of the drive wheel on a high-wheel bicycle. When chain-drive 'safety' bikes came into being, the same system was used, multiplying the drive wheel diameter by the sprocket ratio. The formula is:

[(number of teeth on chainring) / (number of teeth on cog)] * (diameter of drive wheel in inches)

For the sake or simplicity, we'll call the diameter of most 700c & 27" wheels '27"'. So, if you had a 42-tooth chainring and an 18-tooth cog, your gear would be:

[42 / 18] * 27 = 63"

Okay, so now you know how to figure out how big your gear is, what combo do you use...? Good question. Keep in mind that since you can't coast on a fixed gear bicycle, you'll need a gear that will allow you to not only climb most hills but also to DESCEND most hills. If you have never ridden a fixed gear bicycle, this latter issue will be a bit hard to understand until you actually get out there and have to go down something steep. All of a sudden it's a whole new ball game!

Experience has taught me that the above combination of chainring and rear cog is pretty darn versatile for riding around town. Remember, NO gear will be 'perfect' for the flats AND the climbs AND the descents. That's part of the fun of riding a fixed gear bicycle. A 42x18 will allow you to ride comfortably at 18-21 mph on the flats, climb most hills without busting a gut and once you get a few skills, descend most hills without grabbing a handful of brakes.

ASIDE - I like this gear because it's not too big. It's a great change of pace in the off-season. This size gear is like a governor of sorts in that it prevents you from going too fast. No mashing/hammering allowed; it just isn't possible. It's also pretty hilly where I live so if I were to go much bigger, I'd grind to a halt on the climbs and tip over. No fun that. I know some Randonneurs that use larger gears for long rides and if long is what you want then I recommend a 42x16; I rode this combo on a three day, 170 mile ride over three mountain passes and it was perfect. As perfect as an imperfect gear can be anyway.

So, take my advice and get a 42-tooth chainring and an 18-tooth rear cog. If, after riding this for a while you decide to switch, go for it. But, part of the benefit of riding a fixed gear bicycle will only be realized with a 'medium' sized gear like this. See the training page for more on this topic.

Technorati Tags: ,

Racing Tactics

To start, let's define some terms:

ATTACK
People, an attack is NOT a hard pull... It has to be sudden and strong. The idea is to get away from the other riders, to do so cleanly, and not just pick up the pace or string things out. You need to go 100 percent right NOW and then sometimes you need to go 90 percent for a bit longer to discourage any chasers. As a former teammate (and multiple World Masters Champion on the track) once told me, "Sprint like you're going to break your bike in half!" You get the idea.

Some good places/ways to attack are:
  • From about 4th or 5th position. If you attack from the front, everyone can see you accelerate and will do likewise so you won't be surprising anyone. If you go from the very back other riders will have enough time to yell and by the time you get to the front, someone else will have accelerated too. If you launch yourself from the 4th or 5th spot you can build up a head of steam before you go away thus reducing the chance of anybody else latching onto your wheel and everyone won't have so much time to warn the bunch.
  • At the top of a hill when everyone else is tired from climbing the hill.
  • At the bottom of a hill if you can sustain it all the way over the top...
  • Just before a corner where everyone else might slow down.
  • Right after another attack is caught and people are trying to recover from the chase.
  • When your competition is not right on your wheel. Look around before you jump; if you are being shadowed it's probably not the time to go. Try to go when your opposition is on the other side of the pack or at least separated from you by a few other riders.
BREAK
When one rider or a group of riders manages to separate themselves from the rest of the field that is a 'break' or the act of breaking away. This can be the result of an attack (see above) or sometimes it's just the result of someone sitting up and letting a gap open up. If a break goes away and you have enough riders in the race then you have to be in every move. You just need to react and GO; thinking about it only slows you down. When someone initiates a move off the front, it will only take a few seconds for everyone to see who has the best chance of actually getting there and then you support that person who actually manages to make contact or to get away from the bunch.

Getting more than one rider from your team into a break is ideal. To do this you need to attack in tandem or bridge up (see below) to an existing break.

BLOCKING
This is the act of slowing everyone else down or discouraging a chase or neutralizing a chase while your teammate is away off the front. Some ways to block are:
  • Literally blocking the road by lining all your teammates up across it. This is not so hard in the US where amateur racing usually limits you to the right side of the road but it's also not the most sporting thing to do and you might catch some flack.
  • Simply going to the front of the pack and slowing the pace down enough so that your teammate can increase their lead.
  • When someone tries to chase down your attacking teammate, jump on their wheel. Then when they pull over, slow down and don't contribute to the effort.
  • Simply letting a gap open up between you and your teammate so that they can accelerate away and everyone else is stuck behind you or needs to expend the extra energy of riding around you and close the gap themselves.
  • Disrupting a paceline that is trying to bridge up to the break. You simply enter the rotation and then slow the pace slightly when it's your turn to pull. Repeat.
When you block you need to BLOCK! This means you get on it when someone tries to bridge and you swarm any effort. You do not need to sit on the front (unless you want to physically slow the bunch down) so much as you need to keep an eye out and go with anything that moves. The idea is you give people no incentive to chase your teammate because you are always on their wheel getting a free ride. If the riders bridging up to your teammate succeed, now the break has two of you in it. Bonus.

So often I hear from a new racer that something "Isn't fair" or that "So-and-so didn't do their share of the work". Well here's a news flash for you, the winner is usually NOT the strongest rider (although they do need to be relatively strong of course), it's usually just the rider that seized an opportunity and committed themselves to it completely or the smartest rider or the rider with the strongest team. I have achieved some nice results by chasing down a break and then just riding past it. I was for sure super tired but if the break looks at each other to do the work of catching me, I'm hopefully gone.

PACK POSITION
Let's just say you can't do much attacking or blocking when you are at the back of the bunch so if the field is huge or if the roads are narrow or if the pace is high, you NEED to stay very near the front of the pack. We have all been in the situation where we are marooned at the back of the field in a criterium and every corner causes the pack to slow down and then as they accelerate again you get this accordion effect and it forces you to expend so much extra effort. Then, come the finish (if you last that long), you're beat and have to settle for DFL or some similar placing. Here is how to stay up near the front:
  • Whenever someone passes you, get on a wheel ASAP and don't let a whole train of riders pass you by.
  • Any time there is a lull in the pace, move up!
  • If you see a line that no one is using or the whole pack moves to the right or left, go the other way or take that line! No one said moving up was going to be easy, sometimes (read: usually) you need to put out some effort but if you don't, you'll never be there at the finish.
  • Know that you deserve to be there! Lots of people get into races and then get intimidated by other riders. Assert/maintain your space and don't let other people move you off of a wheel.
  • Use your teammates. If you need help moving up, ask for it; if you need in a paceline, ask for room; if you need someone to open up a space for you, let them know.

BRIDGING
When someone else attacks and manages to separate themselves from the field, the act of catching up to them is called "bridging the gap". This is what you will need to do if there is a break up the road and your team is not represented in it. Or, if you do have a teammate up the road but they might need help and you think you can get away from the field cleanly, it's sometimes very nice to have two (or three or four) of you in the same break instead of just one.

It's sometimes good to force other riders to bridge the gap by themselves... Say you have a rider in a break but one team is not represented. You will need to not only block but you will need to watch riders on that team specifically as one of them might try to bridge. If they do, your job will be to sit on their wheel so that they know that if they bridge successfully, they have just given you a free ride to the break. This will not only discourage them from giving it their all but it will also strengthen your presence in the break if they get there.

CHASING
The field splits all the time! Sometimes you can draft other riders and let them pull you back to the lead group but sometimes you or your team has to do the work of pulling back the escapees. So, when do you chase a break? When:
  • you have no one in it
  • you think that you can stack the odds in your favor even more and you can get away from the bunch cleanly
  • the rider in the break has no chance and it's important that someone from your team who does gets there
You do not chase a break just because you are usually better at sprinting than the guy in the break and you wish you were up there yourself. You need to support each person's opportunity that they have created for themselves. Your turn will come and you would expect the same support from your teammates.
Technorati Tags:

Training Basics

To start, let's define some terms:


REST
  • One easy hour on the road. Keep your heart rate monitor handy so you don't go over 120-140/zone 1.
  • Mellow trainer session, something like 30 minutes and keep that heart rate down. Maybe use rollers instead and just work on form.
  • Stay off the bike and get a massage.
Active rest means you want to move the muscles and flush out all the lactic acid so that you are not feeling as heavy or sore the next time you try to go hard. You might start the rest ride feeling like crap but you will hopefully warm up and the legs will become more supple as you go. The goal is finish the easy ride feeling much BETTER than when you started, not more tired. Hydrating helps recovery too.

SPRINTS
  • This consists of short (200-300 m) efforts at 100%/zone 5 with complete recovery in between each effort. Complete recovery is when your heart rate goes back down below 120 bpm or better yet, 100.
  • Pick out a flat stretch of road with a 'start' and a 'finish'. Roll up to the start with some speed (18-20 mph) in a 53x17 or similar and then get out of the saddle and go like stink to the finish. It's OK to shift as you accelerate or to start in a 15, whatever allows you to still push at the finish.
  • After finishing, coast, rest and then pedal easy back to the start for another go.

INTERVALS/HILLS
  • These are longer efforts lasting from 30 seconds to 5-15 minutes each usually in zone 4 or starting in 4 and finishing in 5 if they are shorter.
  • If you find a repeatable stretch of flat road or a hill and time yourself, you will be able to measure your progress.
  • Go hard - like 90% - but not so hard that you will blow before you finish the interval.
  • If you are doing hills (as opposed to intervals on the flats), try to give it an extra push as you crest the hill. Pedal a bit faster/dial it up to 95% or shift up/stand up.
  • Always push through until you are PAST the summit, not just TO the summit. This is mostly for mental fitness (which is almost more important than physical fitness) as attacks usually go when everyone is tired; like at the summit of a hill...

LSD (Long, Slow Distance)
  • First off, this is supposed to be a fun ride. Go places you have always wanted to go or where the scenery is nice.
  • This is NOT the ride to race your friends on. It's the traditional take a bunch of food and water and get lost ride. You should be able to hold a conversation throughout this ride if your company is interesting enough to warrant talking to.
  • In addition to not going too fast, try not to slack off too much either. Steady state is what this is about.
  • 'Slow' is a bit of a misnomer. In the winter this might be zone 2 but in the spring and summer (or if you are fitter or super serious in the winter) these rides are mostly zone 3.

RACE/SIMULATED RACE
  • OK, time to let it all hang out and take some risks. This is where you DO try an attack or two or three. This is where you DO try to jump your friends on a hill by coming from behind half way up. This is where you DO try a breakaway and see if you can hold it. This is where you DO go for a sprint and see what happens.
  • If you never try, not only will your fitness lack that edge, you will never feel mentally ready to give 100% when the pressure is on. This 'mental fitness' is what most racers lack and what ALL winners have.
  • Do enough races where it doesn't matter if you make a mistake in one or two (or three). On the other hand, if you DO make a mistake, try to recover from it. Say you attempt a breakaway in a criterium and it only lasts for one lap; don't let the pack blow you away as they pass by, try to grab a wheel near the front and hang on. If you get shelled on a hill and manage to catch back on, make sure you are at the front for the start of the next hill so it will take that much longer for you to lose contact the next time.
  • If you are on a training ride, don't bother saving anything for the end, this is training! If you pulled most of the time and tried several attacks, you will have benefitted WAY more than the person that drafted all the way and then beat you up the last hill to the car.
ROUTINE
  • Routine is important. Figure out how long before a hard ride you can or need to eat, what foods and sports drinks upset your stomach the least and what works best during the ride.
  • Figure out how often and how much you have to drink and if water is all right or if you need a drink with electrolytes and/or calories. Try different concentrations and different brands of drinks too.
  • Warm up! Before every criterium and before every time trial you should have already put in that first effort which is sometimes so hard to do. Don't worry that it was hard, you know from experience that the second one is always easier. Going for a short ride is OK, but having a trainer at the event is the best thing to do. This way you don't get interrupted by stop signs, traffic, you don't get lost and show up late and get a lousy starting position, etc. 20-30 minutes on a trainer should do it. Finish your warm up about 15 minutes prior to the start so that you can grid well in a criterium or 5-10 minutes before the start of a time trial.
  • After the event, have your recovery drink or something ready in that 30-minute window and then spin easy or stretch or whatever you need to recover the fullest. Follow up with extra liquids, a meal and stay out of the cold/heat/sun if you have another race/stage to do.
  • Have your clothes all ready to go (and bring clothing for ANY conditions as you WILL get surprised a few times), know where your spare safety pins are, carry tools, spare tubes and a floor pump to events, keep snacks and water in your car, research the race route, know what gears to ride, be early and all that other smart stuff.
LOGS/DIARY
  • Record as much as you can; something like this maybe. Hours slept, waking heart rate, how you feel in the morning, what you ate & drank all day, miles ridden, time it took, heart rate, power, route, how you felt (use the same scale all the time if possible), if you partied that night, weather you warmed up prior to the event, etc.
  • The idea here is to be able to build a history so that you can repeat success and avoid mistakes by looking stuff up.
The best diary I have found is Joe Friel's Training Bible, it's similar to what I've always used myself. Until I got a web site that is...
The model WEEK
  • MONDAY - Rest. Active rest or just plain rest.
  • TUESDAY - Sprints. Start out with 3-5 and by mid-season maybe you can do as many as 6-8.
  • WEDNESDAY - Intervals. Hills if you are training for the hills or flats if you have a TT coming up. Start with 3-4 and work up to 6-10.
  • THURSDAY - LSD. This just means this is the day you go for a longer ride. If you feel fresh enough, do some intervals too, i.e. you could combine a group ride with extra miles tacked on before and/or after.
  • FRIDAY - Rest. See Monday.
  • SATURDAY - If you have a race Sunday, this should be a fun ride with some medium efforts. If you are training for something down the road, do the type of training that will benefit you most for that event.
  • SUNDAY - Race or harder & longer training ride. If you are training, don't hold back (see above).
This week is per Greg LeMond. Some people will tell you that Wednesday and Thursday should be reversed which is the 'traditional' training week (originally per Eddie B.) but I think Greg was right. His thoughts are that you should do the hardest effort first in the week when you are the freshest and do subsequently less intense efforts later on when you are more tired. Remember, don't confuse a maximum effort with a workout that leaves you wasted. A sprint is 100% effort but only lasts a short while. Hills will be 90% but last much longer. You can't sprint so well after a hard hill but you CAN climb some after a sprint if you recover for a few seconds in-between. That's the difference.
PEAKING This is usually done by stacking two-four progressively harder weeks on top of each other and then having a bit of a rest or taper. After this rest, you are primed to have a great ride. The hard part is figuring out how much to work each week and how much harder this week can be than the previous one.
Disclaimer: Training to race is NOT what will get you optimally fit for stuff like RAMROD or the Death Ride. And the reverse is true as well. Doing tons of miles will leave you flat for races. To do well as a racer, you need to adjust the length of your rides to match the distance you will race. The longest training ride only needs to be a little longer than the longest race. Either way you go, you WILL be making a compromise so don't sweat it too much and have fun. Realize that you can't specialize in everything at the same time.
If it all gets way too serious, remember why you started cycling in the first place and go back there. If it was to stay fit, enjoy your ride. If it was to wear sexy Lycra clothes, go buy a new outfit and show it off on a ride. If it was to race, race more so you don't have to train as much. If it was to do a sport that did not involve a team, grab your mp3 player and go for a long one.
Technorati Tags:
(this usually means 'active' rest)

25 September 2010

Magnuson Series

Hours
Sleeping
6 Body
Weight
7:00 AM - 181 Body
Fat
7
Pulse
(waking)
  Pulse
(rising)
  Difference  
Time
of Day
9:30 AM Distance 15 km Power  
Time
(total)
1:07:08 (the race clock had me at just under 1:07 for some reason) Time
(moving)
  Time
(stopped)
 
Speed
(overall)
7:12 min/mile Speed
(moving)
  Speed
(max)
 
Total
Ascent
  Max
Elevation
  Gradient  
Breakfast 6:00 AM – cereal
Lunch  
Dinner  
Workout Food 1 gel and water 15 min before start, half a cup Gatorade after 5 km, half a cup water after 10 km
Injuries right knee
Therapy  
Workout Type  
Weather low to mid 60s, sunny, dry, some wind
Course Magnuson Series
Results 15 km – 5th
official results
Equipment old Brooks road shoes
Clothing shorts, sleeveless active t

What an up and down experience... let me fill you in.

Every time I have run outdoors for the last two weeks my right knee has been giving me grief. Especially after a fast or long run.

ASIDE - yes, I finally called my PT and will see what the heck is going on.
So each run I have done lately starts out okay but then I feel totally hamstrung towards the end as I am favoring one leg and I do NOT feel fast. Or even good or comfortable. I did a quick (for me) run Tuesday and my knee hurt. I rested Wednesday and it felt better. I did some track work Thursday and it felt fine until the last interval and then it really hurt. I rested Friday and it felt much better. When I woke up Saturday it felt okay so I took two preventative Ibuprofen with my breakfast and headed to the park.

It was a gorgeous morning. Warm enough to not need a sweatshirt while hanging around the start and this event happened to coincide with Family Fitness Day so there was a 500 m kids run and several parents with strollers that were going to enter the 5 and 10 km event.

As we lined up my stated (read: thought, I was not really talking to anyone but myself) goal was to try and go under 7:30 pace. My long term goal is to run a half marathon at 7:00 pace so two months out this seemed like a reasonable thing to expect. Especially since I have been doing some speed work this fall. There were maybe 40-50 people here doing all three events (5, 10 or 15 km) so I kinda moseyed up to the front to avoid getting stuck behind the slow 5 km crowed and off we went.

ASIDE – the start was totally old school, "On your mark, get set, go!" I loved it.

Right away the pace was fast. I had checked out the results from the last two months and thought to myself that if the same people show up, I could be top three easily and maybe even win this thing... :) Not so today. Instantly a group of about five formed up the road and I settled into another group of about five.

As we got to the first intersection of trails about half a mile in there was a cone in the trail to our left which meant don't go this way. The leader – who was about 50' off the front – hung a left here. Everyone was looking at him and then they started to yell and let him know that he was going the wrong way but he either did not hear or was to embarrassed to admit his mistake or something; he never turned around and we never saw him again. Too funny.

Every year it takes me a while to develop a sense of speed and this year I don't have it yet. So while I knew this pace was too fast, I had no idea by how much. About two miles in I am forced to slow down and some of the guys in my group of five pass me and slowly pull away.

It's a 5 km loop and they have water and Gatorade at the start/finish so I was going to have two chances to grab a drink. Nice. The first time through not much had changed. There were still about five guys up the road in a pack, a few people in front of me and two guys right behind me. I stopped to drink a cup of Gatorade and it was SWEET. Much too sweet/strong. Damn. I dumped most of the cup into the grass, tossed the cup into the trash and started running again. Blech.

As we hit the only hill in the course one guy behind me passed me and then as we rounded the baseball field the other guy behind me passed me. So now there was a 10 second or so gap to the next person behind me and I was alone. About this time I was thinking that if I ran 7:45 pace I would be thankful.

And I was still slowing down! Ever since I dropped off from the leaders I felt like I was slowing just slightly all the time and when these two guys behind me passed me it sorta took the wind out of my sails and I felt like I throttled back even more. Kinda funny how in cycling you want to be right behind someone and while running – for me at least – it's good to have someone right behind you instead. It pushes me along.

And then my right knee started acting up. :( I had read on the Internet (I know, I know...) that if you run on the balls of your feet that your skeleton can cushion you more so I gave this a try. And it worked! My knee felt much better when I would strike on my arch or ball instead of my heel. But it was also much more effort and my calf got tired super fast. Not sure if I was doing it wrong or what, maybe I just have weak calves? So this kind of went back and forth, as my calves got tired I would lapse back into heel striking and my knee would flare up.

The second time through the start/finish I saw several of the 'rabbits' on the sidelines and realized they had just been doing the 10 km run. So I probably started fast needlessly. This time I got some water instead of syrup and it went down much better.

I felt like I was absolutely plodding! My knee was hurting now as opposed to just being uncomfortable and I was breathing hard and there was no one around me as the runner behind me had stopped at 10 km. And then just like that I started to feel better. It was only a tiny amount but it sure helped.  There were also corner marshals at major intersections and they would cheer everyone on as we crossed the road. I always really appreciate that.

About 200 m from the finish line you hit the trail that contains the finish chute. Only problem is you are about 800 m from the finish and instead of turning left and crossing the line you turn right, run 200 m, turn around a cone and then run about 400 m back. Nothing like a u-turn on a narrow path to interrupt your pace is all I gotta say... I think I actually slowed to a walk the first two times through here but this time I accelerated quickly and was determined to ramp it up some for the finishing kick. And I did. Having done a track workout just two days ago helped as I was able to gauge the distance and effort and not die. Don't get me wrong, my 'kick' is more like an infinitesimal acceleration but to me it was a bit of a boost.

After I finished I limped down the trail for a bit to recover and to try and work out my knee. It did not really help. So I had some Gatorade, water and Bear Naked granola (they must have been an event sponsor), got in the van and drove home feeling like I had run slow and hurt myself to boot. Poop.

Oh yeah, my splits were almost exactly the same so turns out I did not slow like I thought and did go slightly faster on the last lap than the second. What do you know.
Hours later I decided to check my pace and low and behold it was great! Obviously I was breathing hard because I was going fast. In retrospect the pace at the beginning was probably around 6:30 or so and then I slowed to my pace. That result was a nice surprise.

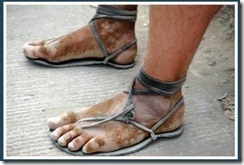
Seems like most of the times I run I see something funny or interesting – stands to reason as I am new to this sport. Today that thing was two guys running in sandals that looked just like this.
sandals_2

They were literally just a layer of rubber covered by a layer of leather and held on to their feet with straps. And these guys looked like total nature boys too... tiny shorts, tattoos, unwashed hair, you get the picture. And they both finished the 10 km course faster than me.

20 September 2010

Abici Time Machine

This used to be my time trial bike. Until I sold it to a friend.

Frame Abici Time Machine – Aluminum
Size No idea...
Fork Abici aluminum
Components Whatever gets the job done!

  • Shimano Ultegra rear derailleur
  • Shimano 105 front derailleur
  • Shimano Dura-Ace 10-speed bar end shifters
  • Vision integrated TT bar
  • 180 mm cranks
Gears 42/55
12-23
Wheels Race - Zipp disk, Mavic Tri-Spoke front
Weight 20 lb.
Notes

This was my first dedicated TT bike ever. I probably paid too much for it but it has served me well and the frame fit. That is important.

Sure, it does not have the latest internal cable routing or tube shapes and the stem is too long but hey, it's my first try.

Technorati Tags: ,

16 September 2010

Ti Cycles Hyak


Frame Ti Cycles Hyak - Titanium
Size 60 cm
Fork Alpha Q Sub 3 – Carbon
Components
  • Shimano Dura-Ace (mostly)
  • FSA K-Wing bars (my favorite!)
  • FSA SL-K Light MegaExo 175 mm
Gears 39/53
12-25
Wheels Race – Mad Fiber
Training – Neuvation R28 SL
Weight  18 lb.
Notes This was the first production Ti frame for Ti Cycles and it's made from Russian titanium and in Russia! How cool is that? I'm not sure; it was pretty rhetorical.

The seatpost was also made by Ti Cycles. The long post flexes noticeably and I like that – extra comfy.

Also known as the 'race' bike or the 'summer' bike or the 'light' bike. This is what I ride when I want to get the lead out. Or just keep up with my fast friends.

Technorati Tags: ,,

14 September 2010

Kona Paddy Wagon


Frame Kona Paddy Wagon – Steel
Size 60 cm
Fork Kona Project 2 – Steel
Components
  • FSA Carbon bars (just because I had them lying around...)
  • 175 mm cranks
  • steel chainring
  • H PLUS SON rims
Gears Fixed - 42x18
Singe - 42x16
Wheels Hand built by me with the stock hubs and some deep rims for the super, duper poser look.
Weight 25 lb.
Notes I had the steerer tube lengthened to 300 mm at a local frame shop in order to get the bars high enough. Kind of expensive but this is such a cool ride and a bike needs to fit the rider after all.

For years my only single speed bike was s fixed gear and for years that gear was a 42x18. But times change and I wanted to try something new so I got a single speed freewheel and experimented. Turns out a 42x16 is pretty darn versatile and I have ridden this gear on a 170 mile, three day ride over three mountain passes and it worked quite well. Riding a fixed gear over a mountain pass scares me.

Now I have a flip-flop rear hub with a 16-tooth freewheel on one side (for keeping up with geared bikes) side and an 18-tooth fixed cog on the other side (for having fun).

13 September 2010

Raleigh Mojave 8.0


Frame Raleigh Mojave-8.0 – Aluminum
Size Large/20"
Fork Nashbar Steel
Components
  • Avid mechanical disc brakes
  • Schwalbe Big Apple tires 26x2.15"
  • 175 mm Kooka cranks (Rasta anodized)
  • Surly steel chainring
  • Surly steel cog
  • Nashbar chain tensioner
  • Tech Lite CNC aluminum brake levers
  • Ti Cycles aluminum stem
Gears 36x15
Wheels Pre-built
Weight 30 lb.
Notes Two words: one speed

I love this bike!

I never had a BMX bike growing up and so this is the closest I have ever come. I used to run platform pedals and being able to hop on in my tennis shoes is a dream. And being able to hop off and not hit the deck or wear out my cleats is also a dream. Climbing the hills between home and work on platform pedals got old so now I use clipless pedals to commute but I still switch it up.

I swapped the QR skewers for some bolt-on ones and so now I feel okay just locking the frame to a bike rack which makes taking this bike to the movies or the store Simple Simon.

With the fat tires it's even lower maintenance than my single speed road bike as I only have to pump up the tires about once/month.

It's what I ride to work 99 percent of the time.

Performance Access XCL

Frame Performance Access XCL (Aluminum)
Size 23"
Fork White Brothers Rock Solid (Carbon)
Components daVinci Designs cranks – 180 mm
Time Atac pedals
Gears 34x20
Wheels DT Swiss hubs
Mavic rims
14g butted spokes
aluminum nipples
hand built by me
Weight 22 lb.
Notes FSA carbon bars
Avid X0 disc brakes
Long ago I sold my full-suspension mountain bike frame to help finance our mountain tandem. Soon I started jonesing for a single dirt bike and since I had most of the parts lying around when I saw this frame on sale I jumped at it.
Never would I have thought that a single speed could be so versatile! Don't get me wrong, if I could only have one mountain bike it would be full-suspension without question but this is so much fun and so LIGHT and after having ridden with friends and not getting dropped (on the climbs AND descents) I love it.
Technorati Tags:

volunteering at FareStart

Our cycling team has been riding in the name of FareStart ever since it was founded two years ago. As a result, and for the first time that I can recall, I have been really excited about working with a charity. When the opportunity arose to volunteer in the kitchen I jumped at it. It was a blast.


FareStart is in downtown Seattle and they have a restaurant, kitchen and offices all at one location.
CIMG6576

I walked down from our house and arrived at the south door of FareStart at around 10:15. All you do is buzz the intercom and a chef opens the door and lets you in. You go down these very inauspicious looking stairs to an underground kitchen.

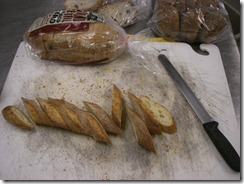
I think I spent about 10 seconds doing nothing and then I had washed my hands, put on an apron, some gloves, a hat and was busy slicing bread.
CIMG6581
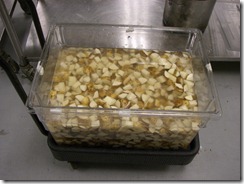
My job was to fill up a giant tub, so I did. I actually got a blister in the process... Man I am soft.

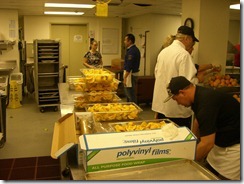
I love institutional kitchens. There is so much space and equipment and it's all so industrial and big and solid. As I was working I kept pausing to pull my glove off, fish my camera out of my pocket and snap a picture. People kept asking me what I was taking all the pictures for... :)

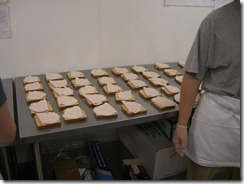
All around me people were busy preparing food and trying to be as efficient as possible. Sandwiches turned into an assembly line.
CIMG6583
Potatoes were cut.
CIMG6590
As were oranges.
CIMG6584
I got to make the pizza sauce.
CIMG6603

Chef Rick and Chef Buck were guiding us throughout the day. Turns out Buck is a graduate of the program and just moved back to Seattle to try and start a life here with his girlfriend. We hit it off (he'd probably hit it off with most anyone to tell you the truth) and chatted throughout the day.

The kitchen was full of BIG stuff. Big bins of spices and dry goods, big utensils like the whisk I'm holding but my favorite big thing was this huge steamer/fryer that we used to sauté onions.
CIMG6600

The 'bin' is about 4x4 feet and about 18" deep. Buck poured in some oil, we dumped in all the onions we had cut and when you are done the entire rig pivots on an axis so you can dump/scoop out the contents. This also facilitates cleaning as you can pour in water, scrub the thing and then tip out the water. Into a floor drain of course. Everyone should have a floor drain in their kitchen in my opinion.

Not only did we get to prepare food for shelters, we got to eat our own cooking.
CIMG6611
That's right, Martin made the pasta broccoli cheese thingy.

What do you do when you are done cooking? You get to clean up! Big kitchens are big clean up projects... We had to wash all the counters with soapy water AND wipe them with disinfectant. Salmonella be gone! Then we had to break down all the cardboard and tin cans for recycling, sweep and mop the floors and take out the garbage, compost and recycling.

Turns out quite a bit (all?) of the ingredients for the food we made is donated. The bread I was slicing was mostly from the Essential Baking Company. How cool is that. In addition they rely on volunteer help every weekend to get the food prepared. To see a graduate of the program working here was amazing; very rewarding to be a part of this.

Here are all the pictures and video.

Technorati Tags: ,

12 September 2010

Northwest Trail Runs–Soaring Eagle Park

Hours
Sleeping
5 Body
Weight
  Body
Fat
 
Pulse
(waking)
  Pulse
(rising)
  Difference  
Time
of Day
9:30 AM Distance 10 miles Power  
Time
(total)
1:19:14 Time
(moving)
  Time
(stopped)
 
Speed
(overall)
7:56 min/mile Speed
(moving)
  Speed
(max)
 
Total
Ascent
  Max
Elevation
  Gradient  
Breakfast 6:15 AM – cereal
Lunch  
Dinner  
Workout Food 1 gel 30 min before start, 1 gel 10 min before start, water
Injuries  
Therapy  
Workout Type  
Weather upper 50s, muggy, dry sky, damp ground, calm, mostly cloudy
Course Soaring Eagle Park
Results 10 mile
4th overall
official results
Equipment Inov-8 Roclite 295, Inov-8 socks
Clothing shorts, short sleeve active t

Yes! I am so excited about this result!

I got to the start a little early and so after checking in I sat in the car listening to music and pinned my number on. About 30 minutes prior to the start it started to drizzle but it stopped five minutes before we took off.

I did not warm up but did do some lunges and stretching as my left hip has been bothering me at the start of almost every run I do. This helped a lot and I was discomfort free at the start and the entire time.

Today I did something foolish in that I wore some new shoes AND socks without ever having tried them out before... I asked my running mentor what kind of trail shoes to get and he recommended these and they showed up two days ago (with a free pair of socks!) so I decided to give them a whirl. Wearing them in the house they felt SO comfy...

At the start there were maybe 40 people total. We had two options, a 5-mile loop and a 10-mile loop. I positioned myself near the front as we had to immediately hit a trail and I did not want to get bogged down. As we took off I think I entered the trail in about 10th or 12 spot.

I was right behind a woman (who ended up winning the women's 10-mile race) and saw a bunch of guys move ahead and figured oh well, I will just let them go. At the start lots of people looked really serious... There was this one buy who pulled up in some over-the-top 2-seater AMG Mercedes and had on the latest in high-tech running shorts, shoes and shirt, this kid (22 years old?) in fancy compression shorts and lots of people had fancy GPS watches on. There were also two guys that were talking about some race up in Whistler that sounded like an ultra so I was just fine with letting people run away from me.

The first .8 miles of trail was wide double track. And we had been told that we would run this same bit back to the finish. On the first descent the woman that I was behind picked it up and passed the guy in front of her so I followed suit. I thought I had seen a couple of guys take off in the lead and in front of us was another bunch so I was pretty happy with my position, and the pace – although faster than I would have done on my own – was doable so far.

ASIDE – in running races I tend to go out a bit too hard and then try to hang on. I was feeling like this was going to be more of the same... :)

About .5 miles later the woman took off her long sleeve shirt and I used this as an opportunity to pass her. Now there was a gap in front of me and then up the road a bit was that main pack of maybe six guys.

We hit the single track and I felt fine. The shoes were working out great! The pace was not killing me although I felt like I was breathing much louder than everyone else around me. :(

We got to another descent and the woman behind me passed me back. I just slotted in behind and since she did not push the pace was able to stick with her. By this time we had lost everyone behind me except for one guy in a fluorescent yellow shirt.

As we got to the first and only support stop at 4 miles I saw the first two guys from the lead bunch simply run on by and head into the woods. Two more people from the lead bunch turned around as they were only doing the 5 mile race. I stopped and gulped a bit of water and the headed out. The woman and Mr. fluorescent also stopped and suddenly I was alone.

But not for long. Soon I could see and hear the two guys in front of me so pushed the pace just a little and after about one mile I was right behind them again. Now we were three; the kid in the compression shorts, Mr. fancy car and me.

But wait, then I heard some guy coming up behind us and he was coming fast. It was fluorescent shirt man and so now we were four.

On a mild climb (the longest straight section of trail on the run) I had some trouble hanging with the two in front of me but we dropped crazy shirt so I dug to stay in contact and managed okay. On the flat sections I was able to recover some and I felt all right on the descents but the short climbs were hard as these guys did not chop their stride at all and really ran up the hills.

And then the shirt was back! This guy was nuts... that was twice he had been dropped good and proper and twice that he had come back with apparent ease. Really strange.

About seven miles in we got to a dog bone out-and-back section. We went down the longest and steepest hill in the race, around a loop in the wetlands and then back up the hill. I kept looking around for the two leaders that I thought were in front of us but never did see them. I assumed they had a sufficient gap to leave this loop before we entered it.

The climb up this hill was hard! This time the two guys in front of me did slow some but they almost shelled me. And we dropped Mr. shirt again.

And one mile later he was back! Argh... I was looking at the kid and I just knew he was going to kick at the end and my kick is non-existent. And if this guy who was doing intervals on the trail was able to reel us back in so easily, he was also going to leave me behind in that last .8 mile stretch. Oh well, I was really, really pleased with myself and running top-10 was quite a rush!

Finally we turned onto the double track and we had not gone 50 feet when the kid moved to the left and simply twisted the throttle. He was gone. Nice.

that was on a slight incline and money bags was also dropping me just a bit but when I looked back I was dropping shirt man so I tried to dig again and keep it up.
But, as the trail leveled of Mr. shirt pulled me back AGAIN and I was just not able to respond. Oh I tried, but there was just no extra speed left in my legs. Kind of a bummer as I did not feel shattered or anything, I just could not go any faster.

By the finish the kid was out of sight and shirt guy actually passed Mercedes man. Good for him! With about 200 m to go Mercedes man looked back to see where I was and coasted across the line. I tried to surge once again but it only lasted like 10 steps! :( Then I was right back to my regular old pace.

As I walked around the parking lot to cool down there was no one else around... Finally I asked the organizer who was recoding times how I did and he said 4th place! So it turns out I had been running with the leaders ever since I caught them after the water stop. How cool is that.

Not that I could have gone any faster had I know, but it sure was a nice pat on the back.

This trail is really fun. It's relatively flat (compared to Cougar Mt anyway) and really scenic. And it was marked super well, we were never in any doubt about where to go at intersections.

Northwest Trail Runs has another event coming up in November, I might see if I can do that one as well as this was a blast.

My shoes were really comfy but my feet slid to the front pretty easily on descents and after the run one nail on each foot was bruised just a little. :( I will try to lace them tighter next time as I think I have ample space.

My take-away from this my first trail race ever is that I need to work on my kick and I should not – jus like in cycling – get intimidated by other's equipment.

Popular Posts